My 1987 build - Step by step

Share your home builds, knock offs and ground up customs.
frusciante89
Senior Member
Posts: 50
Joined: Sat Jul 20, 2013 2:58 am
Just the numbers in order: 13492

My 1987 build - Step by step

Post by frusciante89 » Tue Dec 31, 2013 1:33 pm

Hi guys! I want to share my experience with the 1987... I'm currently finishing it, can't wait to turn it on!
I decided to build all the pieces by myself in order to save some money and to customize it a little bit... First of all, I searched for the transformers, and I was undecided between INGO (germany) and inMADout (italy): I chose inMADout at the end of the day, and got the trannies by the end of august (seems like looooong time ago :)....
Image
next it was the turn of the chassis: I wanted to build a 50w 1987 with the LarMar mod, so I designed my custom chassis with Solidworks adding an extra hole for the dual pot near the presence pot... This was what I handed down to the laser cutting factory:
(just ask if you need the file, I'll be happy to share it)

Image
After almost 1 month and a half ( :evil: :evil: :evil: ) the piece was ready:

Image
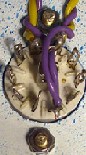
Next, I decided to paint the chassis white (having a pal working at an auto body shop is handy). I just love the result: :thumbsup:

Image

Then I had the front and back panel made out of gold plexiglas... as far as concerns the artwork, I simply applied a sticker...

Image
Image
Last edited by frusciante89 on Fri Jan 03, 2014 8:00 am, edited 1 time in total.

frusciante89
Senior Member
Posts: 50
Joined: Sat Jul 20, 2013 2:58 am
Just the numbers in order: 13492

Re: My 1987 build - Step by step

Post by frusciante89 » Tue Dec 31, 2013 1:46 pm

As far as concerns the electronics, I'm posting some of the pics I've taken...

Image

Image

Image

Image

Image

Image

Image

Image
Last edited by frusciante89 on Fri Jan 03, 2014 8:00 am, edited 1 time in total.

User avatar
neikeel
Senior Member
Posts: 7231
Joined: Tue Dec 06, 2005 8:31 am
Location: Suffolk, England

Re: My 1987 build - Step by step

Post by neikeel » Wed Jan 01, 2014 11:11 am

Great attention to detail and looks nice clean work.

An unusual thing -the PT and OT are different orientation to Marshall but I guess will make no difference (it is the relationship with each other that is important).

Will be interested to hear how those transformers work out - I know the IG ones are good, where did you hear about the MADout ones?
Neil

frusciante89
Senior Member
Posts: 50
Joined: Sat Jul 20, 2013 2:58 am
Just the numbers in order: 13492

Re: My 1987 build - Step by step

Post by frusciante89 » Fri Jan 03, 2014 7:34 am

Thanks :thumbsup: I like to keep it neat :) I heard about the inMADout from a friend of mine who used them in one of his build... They seem to sound flawlessly...
Btw, I'm having some issues in wiring the power section... My PT has only two primary red wires (I've only the 220V option), and I need to be sure of what I'm doing before turning this baby on... For example, can the neutral and live wire be swapped? Does it make a difference? This is the schematic...

http://postimg.org/image/l6f67xffx/
Last edited by frusciante89 on Fri Jan 03, 2014 7:59 am, edited 1 time in total.

User avatar
neikeel
Senior Member
Posts: 7231
Joined: Tue Dec 06, 2005 8:31 am
Location: Suffolk, England

Re: My 1987 build - Step by step

Post by neikeel » Fri Jan 03, 2014 7:44 am

No you should be fine (ac is no that discriminatiing!)

On new builds I use a DP switch to switch live and neutral at the same time as well
Neil

frusciante89
Senior Member
Posts: 50
Joined: Sat Jul 20, 2013 2:58 am
Just the numbers in order: 13492

Re: My 1987 build - Step by step

Post by frusciante89 » Fri Jan 03, 2014 7:58 am

oh ok...! could you help with the remaining routing in the pic? :help:

User avatar
neikeel
Senior Member
Posts: 7231
Joined: Tue Dec 06, 2005 8:31 am
Location: Suffolk, England

Re: My 1987 build - Step by step

Post by neikeel » Fri Jan 03, 2014 9:20 am

Sorry!

Take the red wire to other pole of your on/off switch.
Neil

frusciante89
Senior Member
Posts: 50
Joined: Sat Jul 20, 2013 2:58 am
Just the numbers in order: 13492

Re: My 1987 build - Step by step

Post by frusciante89 » Fri Jan 03, 2014 9:27 am

ok... and what about the lamp, the standby and the ht fuse?

User avatar
neikeel
Senior Member
Posts: 7231
Joined: Tue Dec 06, 2005 8:31 am
Location: Suffolk, England

Re: My 1987 build - Step by step

Post by neikeel » Fri Jan 03, 2014 10:46 am

Depends on the lamp you have. I generally use 6.3vac type and wire to one of the output tubes heaters. If you have a 220v type simply wire one to your neutral wire (at the input on the back will do - at the PT is neater if it has lugs) and the other wire to the cold wire of the mains switch (ie the one that sees juice when you throw the switch on.

The HT fuse is usually wired by taking the rectified power (B+) via a red (conventionally) wire to the tip of the fuse holder. The other terminal of the fuse holder (the body) usually used as the tie point of centre tap of your OT and the choke wire (the other limb of the choke wire takes the B+ to the circuit board.

You can choose where you wire the standby switch. Again on new builds I take the HT from the mains tranny as ac to the double pole switch, the cold (switched) terminals then take ac to the rectifier diodes.

The other way is to hard wire your PT to the rectifier and use a single pole switch to interrupt the red wire I mentioned before the fuse. (as per Georges 50w instructions, IIRC).
Neil

frusciante89
Senior Member
Posts: 50
Joined: Sat Jul 20, 2013 2:58 am
Just the numbers in order: 13492

Re: My 1987 build - Step by step

Post by frusciante89 » Sat Jan 04, 2014 7:39 am

I live in italy, so plugs can be inserted both ways, so distinguishing between N and L makes no sense to me... Do I need to install a fuse for L and one for N? :shrug:

frusciante89
Senior Member
Posts: 50
Joined: Sat Jul 20, 2013 2:58 am
Just the numbers in order: 13492

Re: My 1987 build - Step by step

Post by frusciante89 » Sun Jan 05, 2014 10:02 am

This is the circuit, almost done (apart from the power section)... By the way, I was thinking of using a fuse for N and a fuse for L in order to solve the EU plug problem: will this affect the sound to any extent? Also, should I twist the primary wires of the PT (the two brown wires in the pic)?

Image

Image

Image

Image

Image

Image

big_teee
Senior Member
Posts: 73
Joined: Tue Sep 13, 2011 9:40 pm
Just the numbers in order: 7

Re: My 1987 build - Step by step

Post by big_teee » Sun Jan 05, 2014 1:45 pm

Looks good, I've been following your build and progress.
Some Observations.
I prefer a 3 inch wide board, over your narrow one, but any wider than 3 inch is hard to get around.
After fighting hum on builds, I no longer do my heater leads the Marshall way.
I tight twist all the way, I route like marshall against the chassis wall, but route my leads over the tubes instead on the sheet metal around the tubes.
Especially on V1a.
On a 2204 cascade build, that was the only way to kill the hum.
I tight twist like shown on the valve wizard site. (Granted it's not vintage)
http://www.valvewizard.co.uk/HeaterWiring2.jpg" onclick="window.open(this.href);return false;
I no longer do the multiple grounds, or grounds on the Pots.
Too many sources for hum, and ground loops.
Good Luck on your build.
Terry

frusciante89
Senior Member
Posts: 50
Joined: Sat Jul 20, 2013 2:58 am
Just the numbers in order: 13492

Re: My 1987 build - Step by step

Post by frusciante89 » Mon Jan 06, 2014 6:06 am

Thanks Terry for your interest! Can you explain to me a little bit better the heater wiring? Can't see much in that pic :(
I'm thinking of removing the pot buss grounding, and might go for a Larry star grounding, is it the way to go? Since I almost finished the amp, I don't want to drill extra holes... (Plus, if I try I'll certainly chip the paint)
Can I use the transformer and board bolts as ground points?
Cheers, Andrea

User avatar
neikeel
Senior Member
Posts: 7231
Joined: Tue Dec 06, 2005 8:31 am
Location: Suffolk, England

Re: My 1987 build - Step by step

Post by neikeel » Mon Jan 06, 2014 11:39 am

frusciante89 wrote:Thanks Terry for your interest! Can you explain to me a little bit better the heater wiring? Can't see much in that pic :(
I'm thinking of removing the pot buss grounding, and might go for a Larry star grounding, is it the way to go?
Can I use the transformer and board bolts as ground points?
Cheers, Andrea
Do not use the transformer bolts and yes you can use the board mounting bolts, the most important bit of Larry grounding is to move the heater centre tap ground to the input grounding lug. You can put the lugs under the spacer between chassis and the spacer - not the board itself.
Personally find no issue with hum rejection the way you have done it although I do not loop the black wire around the socket bolt - keep them short. Also keep plate wires along metal chassis floor and raise the green grid wires a little. Make sure where wires cross the do so at right angles etc.
Neil

frusciante89
Senior Member
Posts: 50
Joined: Sat Jul 20, 2013 2:58 am
Just the numbers in order: 13492

Re: My 1987 build - Step by step

Post by frusciante89 » Mon Jan 06, 2014 11:53 am

Sorry, I didn't get the last line (I'm not native english :) )... what did you say I should do in the crossings?
By the way, excluding the trannies bolts, I'm left with only three usable board bolts... what about the choke bolts? should I avoid them as well...?
Thanks for your help...

Post Reply