Small update: I received the lacquer and tested it on a piece of paper. After drying the lacquer shows no signs of having a purplish hue to it. It´s transparent with a very slight yellowish tinge - exactly as stated in the description. I tested that in bright daylight and interior lighting - no purple. That´s probably just visible under pure UV-light. This lacquer looks EXACTLY like the stuff that already was on my trannies originally and it also says "conformal coating" on the can. I´m pretty sure it´s good to use.
Next step is carefully trying to remove the surface rust. After that the coils on the trannies can be masked and I can apply the varnish on the iron cores.
I asked the galvanizer about my chassis: It should be ready at the end of next week. Hopefully the varnish on the trannies is already dry by then and I can resume the build.
1969 SB build - the journey begins
-
young flower
- Senior Member
- Posts: 119
- Joined: Sun Mar 04, 2012 7:38 pm
- Just the numbers in order: 13492
- Location: Austria, Vienna
-
demonufo

- Senior Member
- Posts: 3882
- Joined: Thu Dec 13, 2007 8:36 am
- Just the numbers in order: 13492
- Location: Carterton, Oxon, U.K.
- Contact:
Re: 1969 SB build - the journey begins
Don't worry about masking the coils. Sure ain't gonna hurt them, it can only do good(apart from any parts you need to solder to, although most of these are designed to dissolve cleanly with a soldering iron). Just hang the core by one of the holes and spray the lot, first lightly, then a thicker coat after about two minutes.
So I like purple, okay!!!!!!
83.7% of all statistics are made up on the spot!
83.7% of all statistics are made up on the spot!
-
young flower
- Senior Member
- Posts: 119
- Joined: Sun Mar 04, 2012 7:38 pm
- Just the numbers in order: 13492
- Location: Austria, Vienna
Re: 1969 SB build - the journey begins
Update:
Yesterday, I sprayed the second coat of transformer varnish on PT, OT and choke after letting the first layer cure for one night.
The result looks good, we´ll see how it looks when the varnish has completely dried after this weekend.
Pictures will follow.
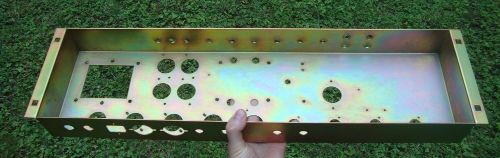
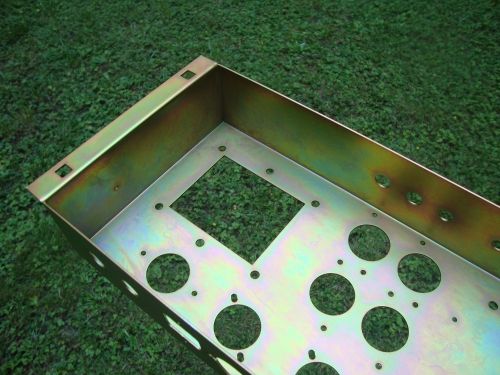
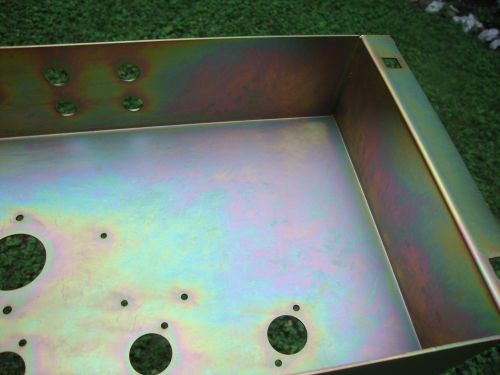
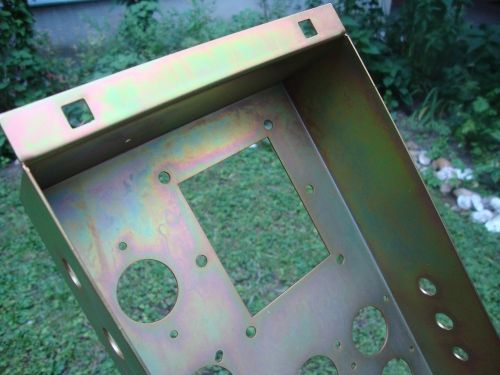
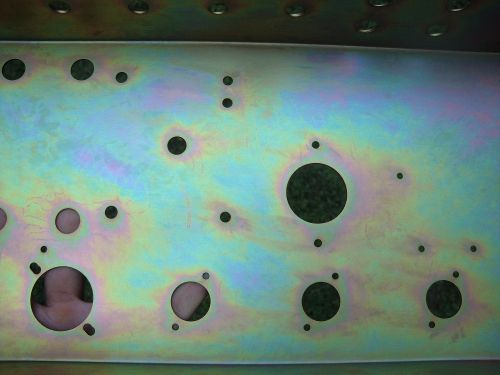
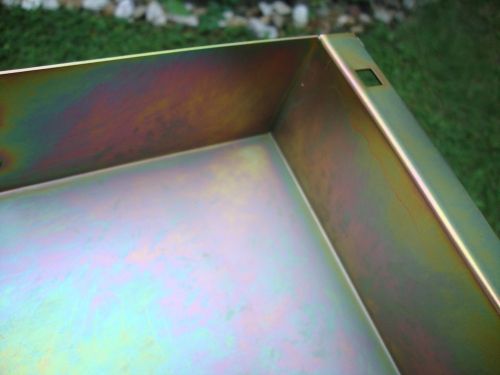
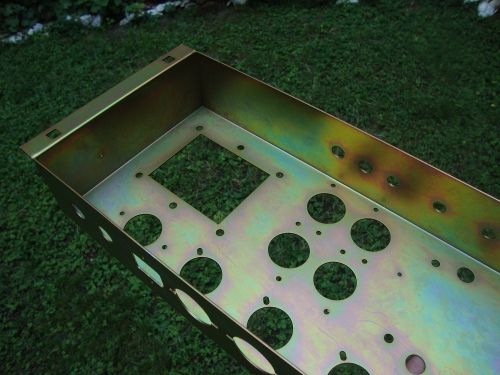
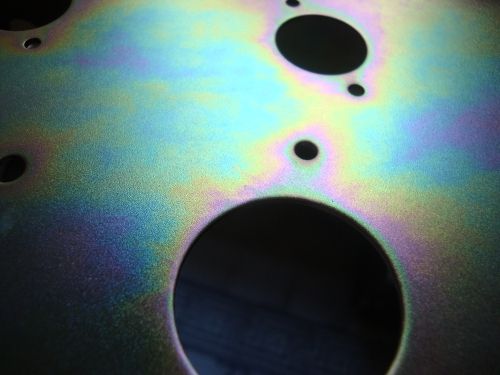
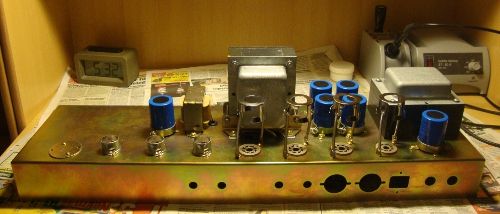
The chassis is back from the galvanizer. This is how it looks after glass beading and re-galvanizing with a yellow zinc chromate finish. The glass beading harmonized/removed any scratching that occured previously and gave the steel a satin finish. The gold looks great - I´m very pleased with the result:


Yesterday, I sprayed the second coat of transformer varnish on PT, OT and choke after letting the first layer cure for one night.
The result looks good, we´ll see how it looks when the varnish has completely dried after this weekend.
Pictures will follow.
The chassis is back from the galvanizer. This is how it looks after glass beading and re-galvanizing with a yellow zinc chromate finish. The glass beading harmonized/removed any scratching that occured previously and gave the steel a satin finish. The gold looks great - I´m very pleased with the result:


-
young flower
- Senior Member
- Posts: 119
- Joined: Sun Mar 04, 2012 7:38 pm
- Just the numbers in order: 13492
- Location: Austria, Vienna
Re: 1969 SB build - the journey begins
Oke - the story goes on.
The varnish on the trannies is dry.
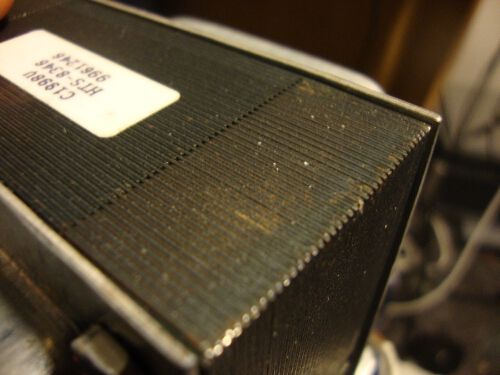
That´s what they looked like before (the reason I decided to apply an additional layer of varnish):
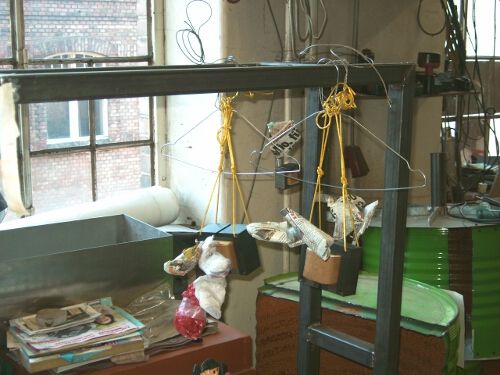
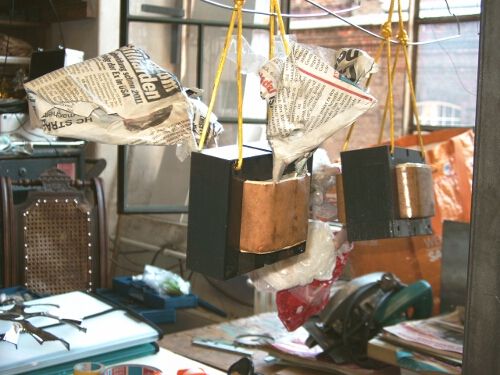
Here are two pictures of how I prepared and suspended them for the varnishing/drying in the workshop of a nearby community center:
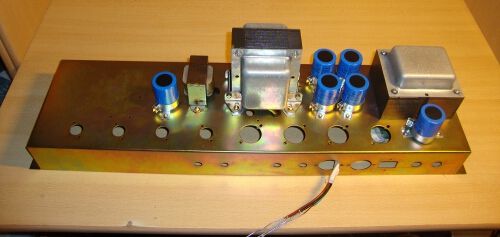
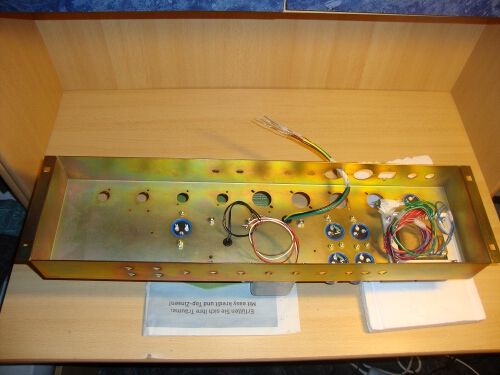
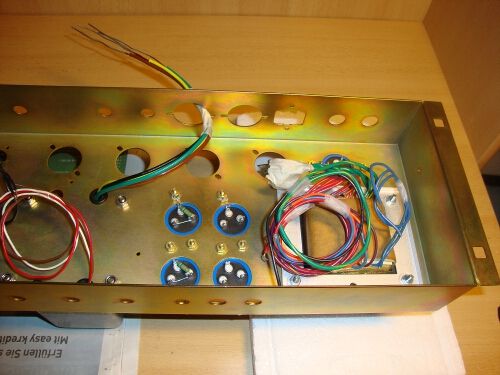
That´s what the new chassis looks like with some of the hardware installed:
I do have a new little problem however:
The PT had a slightly damaged (indented) corner when I received it. I didn´t really pay attention to it before - but when I installed the PT on the new chassis the deformed metal dug a bit into the chassis surface. And since I recently learned more about trannies and the importance of the laminations being electrically isolated from each other (and most probably from the chassis?), I removed the tranny once again, used a hammer to flatten the protruding metal corner a bit and covered it with a drop of varnish. I let that drop dry over night and reinstalled the tranny.
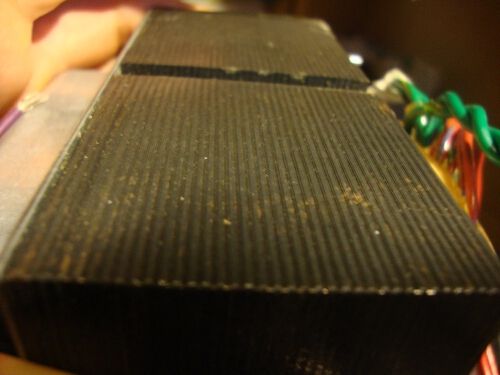
Here are some pictures of the problem:
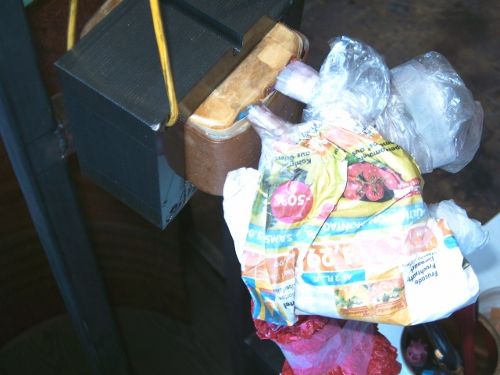
and a closeup:
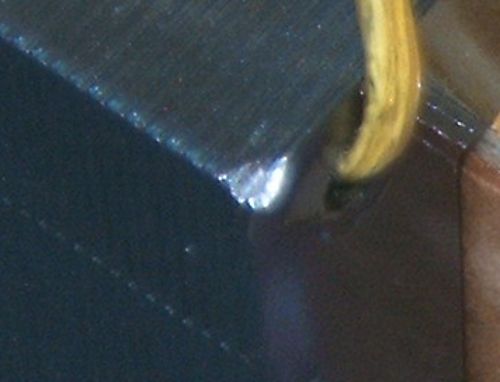
My question is - do you think there could be any problems if the corner turns out not to be completely isolated from the chassis?
Any other advice?
Thanks in advance
YF
The varnish on the trannies is dry.
That´s what they looked like before (the reason I decided to apply an additional layer of varnish):


Here are two pictures of how I prepared and suspended them for the varnishing/drying in the workshop of a nearby community center:


That´s what the new chassis looks like with some of the hardware installed:


I do have a new little problem however:
The PT had a slightly damaged (indented) corner when I received it. I didn´t really pay attention to it before - but when I installed the PT on the new chassis the deformed metal dug a bit into the chassis surface. And since I recently learned more about trannies and the importance of the laminations being electrically isolated from each other (and most probably from the chassis?), I removed the tranny once again, used a hammer to flatten the protruding metal corner a bit and covered it with a drop of varnish. I let that drop dry over night and reinstalled the tranny.
Here are some pictures of the problem:

and a closeup:

My question is - do you think there could be any problems if the corner turns out not to be completely isolated from the chassis?
Any other advice?
Thanks in advance
YF
-
tfrost33
- Senior Member
- Posts: 363
- Joined: Mon Dec 11, 2006 11:53 pm
- Location: Wyoming
- Contact:
Re: 1969 SB build - the journey begins
Man I have been following this thread.... I sure hope this doesn't affect your build, as I am sure you are itching to get going on this thing...
http://www.soundclick.com/tfrost" onclick="window.open(this.href);return false;
http://www.myspace.com/lookerwy" onclick="window.open(this.href);return false;
http://www.myspace.com/borzayamusic" onclick="window.open(this.href);return false;
http://www.myspace.com/lookerwy" onclick="window.open(this.href);return false;
http://www.myspace.com/borzayamusic" onclick="window.open(this.href);return false;
-
young flower
- Senior Member
- Posts: 119
- Joined: Sun Mar 04, 2012 7:38 pm
- Just the numbers in order: 13492
- Location: Austria, Vienna
Re: 1969 SB build - the journey begins
I hope so too... You bet I am.
Good luck with the voltage testing on your amp! May it scream soon!
Does anyone have advice for the problem with my PT described at the end of my last post above?
Is the PT still good to use? Does the damaged corner have to be isolated from the chassis - if so what´s the best method?
Thanks a lot in advance guys
YF
-
young flower
- Senior Member
- Posts: 119
- Joined: Sun Mar 04, 2012 7:38 pm
- Just the numbers in order: 13492
- Location: Austria, Vienna
Re: 1969 SB build - the journey begins
Oke - after a long pause, I´m back. Had to apply varnish to the damaged tranny and wait for some small parts to arrive. The build is in full progress now.
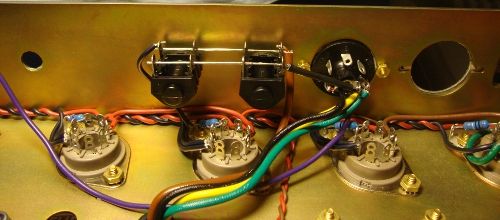
Heaters are done:
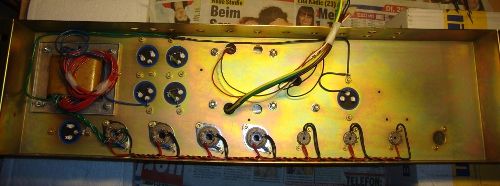
Heaters are done:


-
demonufo
- Senior Member
- Posts: 3882
- Joined: Thu Dec 13, 2007 8:36 am
- Just the numbers in order: 13492
- Location: Carterton, Oxon, U.K.
- Contact:
Re: 1969 SB build - the journey begins
Very neat work. 
It would have been advantageous to twist the heaters on both red runs as opposed to just the runs between the sockets, rather than leave one straight, but it looks tightly enough coupled to the black runs to not worry too much about it.
It would have been advantageous to twist the heaters on both red runs as opposed to just the runs between the sockets, rather than leave one straight, but it looks tightly enough coupled to the black runs to not worry too much about it.
So I like purple, okay!!!!!!
83.7% of all statistics are made up on the spot!
83.7% of all statistics are made up on the spot!
-
young flower
- Senior Member
- Posts: 119
- Joined: Sun Mar 04, 2012 7:38 pm
- Just the numbers in order: 13492
- Location: Austria, Vienna
Re: 1969 SB build - the journey begins
Yes - that´s what I did on my "first try" (with the chassis in original state - earlier in the thread). But then I decided to simply do it the original "Marshall" way. I think it turned out acceptable .
-
young flower
- Senior Member
- Posts: 119
- Joined: Sun Mar 04, 2012 7:38 pm
- Just the numbers in order: 13492
- Location: Austria, Vienna
Re: 1969 SB build - the journey begins
Ok guys - I could use some advice here: I´m unsure of how to best route the output transformer secondary wires since I read in the 67 10000 Superbass thread that this is a critical point in the amp´s layout.
Here is an overview with the possible wire routing options outlined (the impedance selector hole is pretty much behind V6 on my chassis - just slightly to the right):
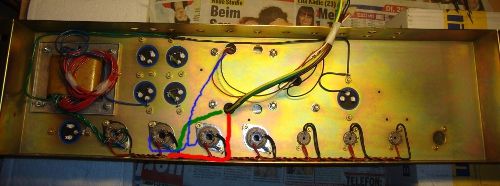
green is what the instructions say
red is what I think would be better because that way the secondaries wouldn´t cross the primaries - am I right?
the OT primaries are outlined in blue just to remind you of where they will be in relation to the secondaries
Also - what do you think: should the secondaries be twisted too, like the primaries?
Looking forward to your replies
YF
-
neikeel

- Senior Member
- Posts: 7231
- Joined: Tue Dec 06, 2005 8:31 am
- Location: Suffolk, England
Re: 1969 SB build - the journey begins
Personally I do not think that it is that critical, you see all sorts of alighnments on vintage Marshalls that seem to work well. Generally if signal wires cross others they should do so at right angles, so having your primaries and secondaries tightly bundled together parallel in the same loom would be a bad idea. The original 12 series have solid secondary wires that are bent at right angles from the grommets then under the cap board and then to the selector, they are slightly raised off the chassis (and the primaries are layed down on the chassis) so they are not too close.
The way you have drawn it will work fine (bringing wires to the chassis wall between V4 and V5 and then along to the selector.
Either way will work (IIRC the issue that was a problem with the 67 10series was another one and people were shooting from the hip with ideas).
The way you have drawn it will work fine (bringing wires to the chassis wall between V4 and V5 and then along to the selector.
Either way will work (IIRC the issue that was a problem with the 67 10series was another one and people were shooting from the hip with ideas).
Neil
-
demonufo
- Senior Member
- Posts: 3882
- Joined: Thu Dec 13, 2007 8:36 am
- Just the numbers in order: 13492
- Location: Carterton, Oxon, U.K.
- Contact:
Re: 1969 SB build - the journey begins
I agree with Neil. Running parallel with the heaters will be more of an issue than crossing the primaries. Crossing is never an issue really, but it helps to avoid parallel running if possible.
You could also raise the secondaries away from the chassis slightly if you like, whilst keeping the primaries tight to the chassis.
You could also raise the secondaries away from the chassis slightly if you like, whilst keeping the primaries tight to the chassis.
So I like purple, okay!!!!!!
83.7% of all statistics are made up on the spot!
83.7% of all statistics are made up on the spot!
-
young flower
- Senior Member
- Posts: 119
- Joined: Sun Mar 04, 2012 7:38 pm
- Just the numbers in order: 13492
- Location: Austria, Vienna
Re: 1969 SB build - the journey begins
Oke - thanks guys. I think I´ll stick to the instructions then and go with the green option but will lift the secondaries slightly off the chassis.
-
young flower
- Senior Member
- Posts: 119
- Joined: Sun Mar 04, 2012 7:38 pm
- Just the numbers in order: 13492
- Location: Austria, Vienna
Re: 1969 SB build - the journey begins
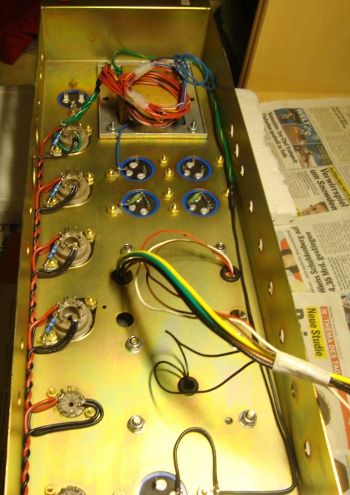
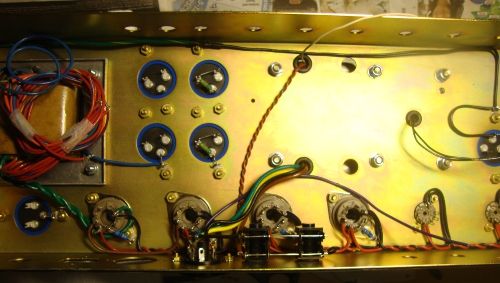
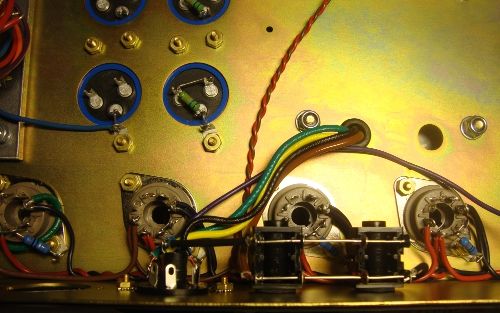
New pics - OT connections and output jacks are done:


-
demonufo
- Senior Member
- Posts: 3882
- Joined: Thu Dec 13, 2007 8:36 am
- Just the numbers in order: 13492
- Location: Carterton, Oxon, U.K.
- Contact:
Re: 1969 SB build - the journey begins
Twisting the secondaries to keep them tightly coupled is also beneficial, btw...
So I like purple, okay!!!!!!
83.7% of all statistics are made up on the spot!
83.7% of all statistics are made up on the spot!